Transform Your Images with the Power of AI, Right in WordPress
Nano-Banana is a revolutionary WordPress plugin that seamlessly integrates with your media library and content editors to bring you the power of generative AI image editing. Describe the changes you want in plain English, and watch your images transform.
Key Features
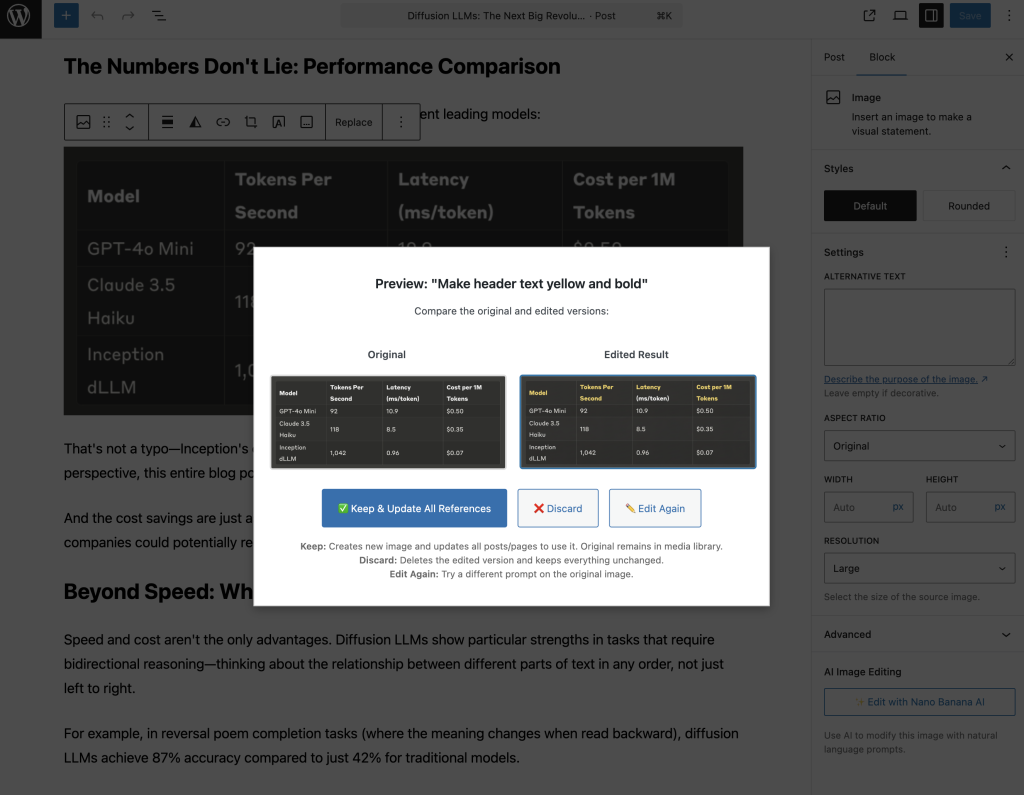
- Seamless IntegrationDirectly edit your images in Gutenberg, Classic editor, and Media Library without leaving WordPress.
- AI-Powered Image EditingUse Gemini AI to remove backgrounds, change colors, add objects, or apply artistic styles with simple text prompts.
- Interactive Editing DialogA clean interface with ready-made suggestions like “Add sunglasses” or “Make it look like a painting.”
- Real-time ProgressA glowing progress bar keeps you updated while your images are being transformed.
- Preview and CompareSide-by-side comparison of original vs. AI-edited images before saving.
- Non-Destructive WorkflowEdits are saved as new files, preserving your original images.
- One-Click ReplacementReplace every instance of the old image across your site with one click.
- Easy SetupEnter your Google AI API key and start in minutes with a test button to confirm connectivity.
Download here or From GitHub
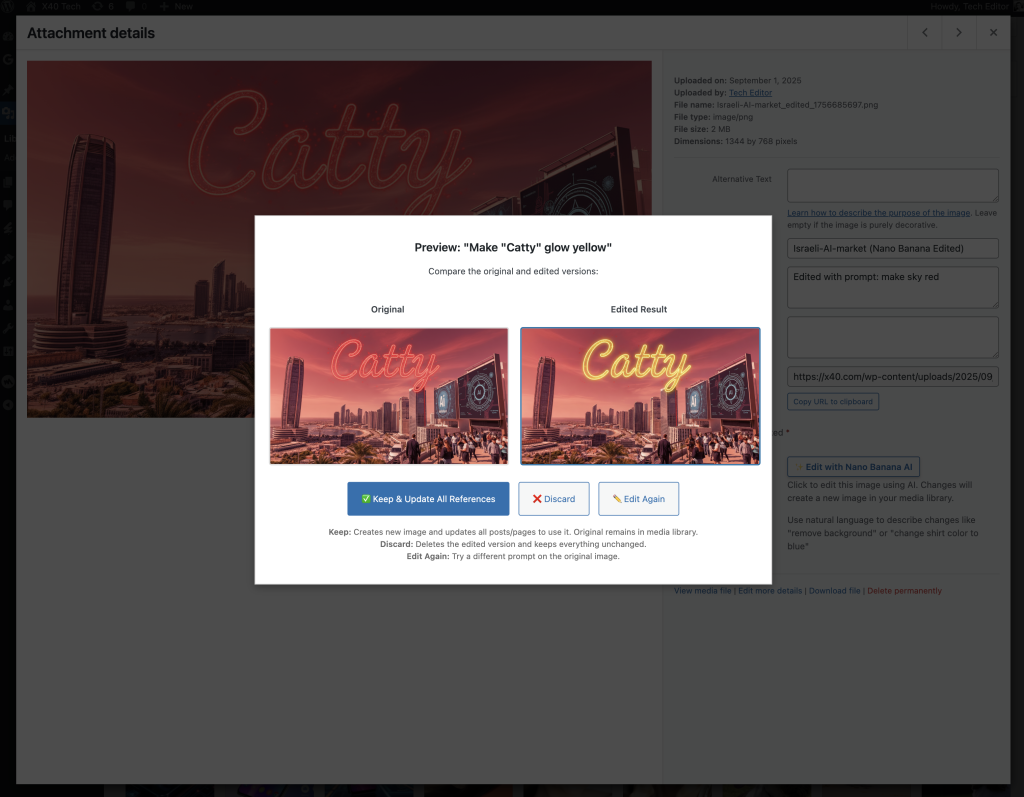
Simply click an image and then click “Edit with Nano Banana AI” button and type the prompt you would like to use to change the selected image. For example: “Change color on the car from red to blue”, “Remove the second person from the left”, “Change the blue sky to sunset red”…
How to Install the Nano-Banana Plugin
Follow these instructions to manually install and configure the plugin on your WordPress website.
Step 1: Download and Upload the Plugin Files
This process requires you to add the plugin files directly to your website’s folders. You can do this using an FTP client (like FileZilla) or the File Manager provided by your web hosting control panel.
- Download the Plugin: First, download the nano-banana-editor.zip file to your computer.
- Extract the Files: Unzip the nano-banana-editor.zip file. This will create a new folder named nano-banana-image-editor (or similar).
- Upload the Folder: Connect to your website’s server and navigate to the WordPress plugins directory, which is located at:
/wp-content/plugins/ - Upload the entire nano-banana-image-editor folder (the one you just unzipped) into this plugins directory.
Step 2: Activate the Plugin in WordPress
Once the files are uploaded, you need to activate the plugin within your WordPress dashboard.
- Log in to your WordPress admin dashboard (e.g., yourwebsite.com/wp-admin).
- Navigate to Plugins > Installed Plugins from the left-hand menu.
- You should now see “Nano Banana Image Editor” in your list of plugins. Click the Activate link below its name.
Step 3: Add Your Google AI API Key
The final step is to connect the plugin to the Google AI service.
- After activating, go to Settings > Nano Banana in the left-hand menu.
- You will see a field to enter your Google AI API Key.
- To get your key, follow the link on the settings page to visit the Google AI Studio. You may need to sign in and create a new project to generate an API key.
- Copy your new API key from the Google AI Studio.
- Paste the key into the “Google AI API Key” field on your WordPress site.
- Click Save Settings.
- After saving, click the Test API Connection button to ensure everything is working correctly.
You are now ready to start editing your images! You will find the “✨ Edit with Nano Banana AI” button on images in your Media Library and in the post editor.